Tips of the month – May

With the weather getting warmer and risk of frost having passed, there is a lot that can be planted in both the flower and vegetable garden in May. 

Weather watch:

Although the risk of frost is diminishing, it is still a possibility as warm, cloudless days can be followed by cold nights. Keep an eye on the forecast and don’t be tempted to plant out tender plants until the end of the month. 

Toughen up tender plants 

Seedlings nurtured indoors cannot be planted outside straight away. Instead toughen them up by placing them outside in a sheltered spot for a few hours during the day then bring them inside. Gradually increase the amount of time they spend outdoors . Do this for a period of one or two weeks before planting directly into the ground. 

Divide Primroses

These spring plants can become congested over time . To reinvigorate them  and keep them producing blooms in future years, divide after they finished flowering:

  1. Dig them up: choose a cool day when the ground is moist
  2. Separate the plants: Using a spade pull apart the clump or slice into sections.
  3. Replant your divisions: backfilling the planting hole with compost or leaf mould. 
  4. Water well. 

Prune spring-flowering shrubs 

Flowering shrubs such as forsythia, ornamental currants, viburnums, chaenomeles (flowering quince) need to be pruned straight after flowering so there is plenty of time for new growth to develop and produce flowers next spring. 

  1. Use sharp, clean secateurs or loppers for thicker stems and remove any dead or damaged growth to a healthy bud or to the base of the stem.
  2. Prune out any stem growing in the wrong direction and spoiling the shape of the plant
  3. If the shrub is very congested, thin out the stems by removing a couple from the centre of the plant right down to the base. 

Plant out summer bedding and sweet peas 

Towards the end of the month, plant out begonias, tender salvias, pelargoniums, lobelias, sweet peas… Acclimatise plants to outdoor conditions  by putting them outside during the day and bringing them in at night for a week or two. Put the necessary support in place for climbing and trailing. 

Plant up baskets and window boxes with tender plug plants 

For long lasting summer colours it’s the right time to plant up hanging baskets and pots. If it becomes too cold for these plants to stay outside, keep your baskets and containers in a porch or greenhouse for a couple of weeks. 

Sow beans runner beans and French beans 

  1. Sow dwarf, French and runner beans:  5 cm deep into deep pots of peat-free compost and germinate on a sunny windowsill. 
  2. Set up supports ready for climbing types:  simply place three to four bamboo canes into the ground and tie to gather at the top. 
  3. Plant the beans outside once they have established, from late May. 

Earth up potatoes

Once the stems are 20cm tall, draw soil up to form a ridge along the row. 

This protect shoots from frosty and excludes light, which turns potatoes green and inedible.

Grow salads

Ensure a continuous supply of fresh leaves by sowing a small amount of seed every two to three weeks. 

Plan for a winter harvest

Sow slower-growing vegetables such as cabbages, broccoli and kale for harvesting in winter. Sow seeds in module tray or seedbed for transplanting to final position later. 

Don’t forget 

  • Keep on top of weeds: regularly hoe off or pull out annual weeds to prevent them establishing  and setting seeds.
  • Get slug hunting: watch plants closely for signs of slug damage.
  • Train climbers: tie in soft new shoots of climbing clematis and honeysuckle to their support. 
  • Apply a mulch:  to retain moisture: late spring is the perfect time to apply mulch. Adding a 5-7cm layer will help to retain moisture before drier summer conditions arrive.
  • Set up plant supports: put plant support in place before perennials get too big.
  • Water wisely during dry spells: focus watering on newly planted specimens. Do your watering in the early morning or early evening to minimise water loss from evaporation. 

The Lakehouse and AHS Gardeners

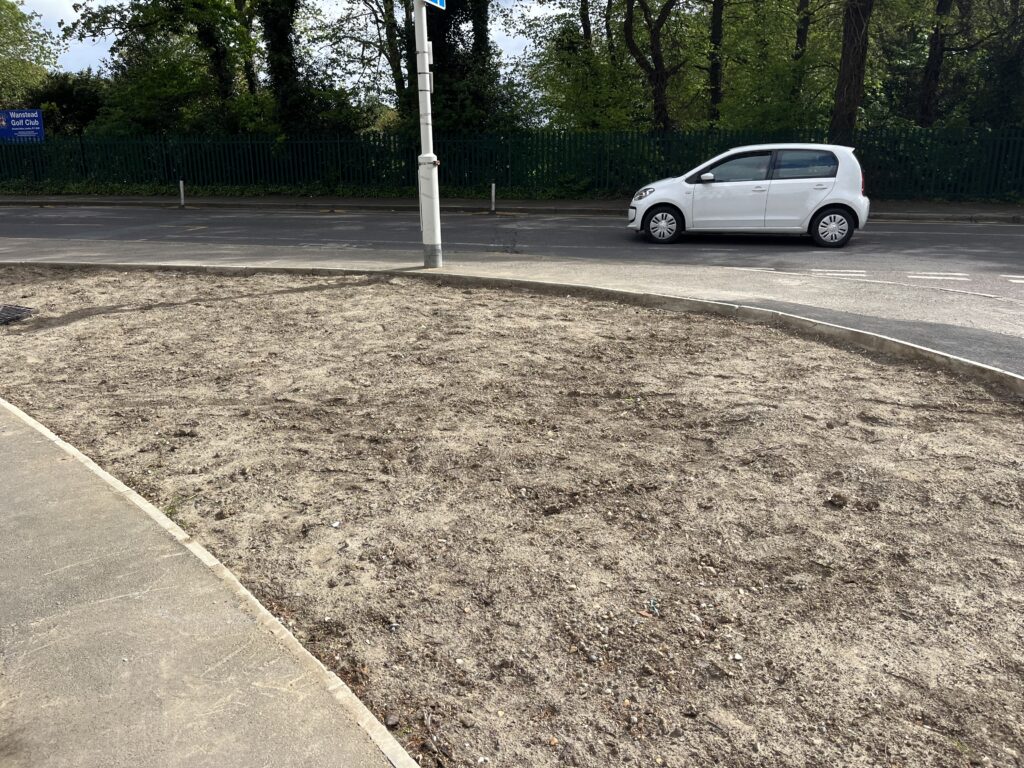
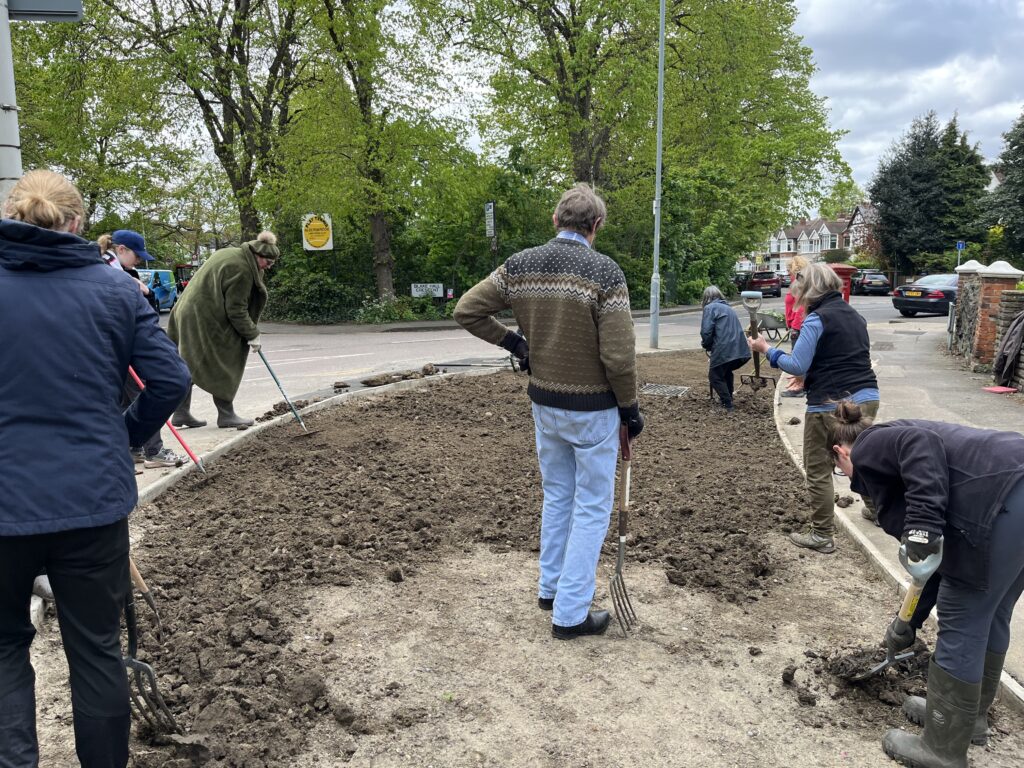
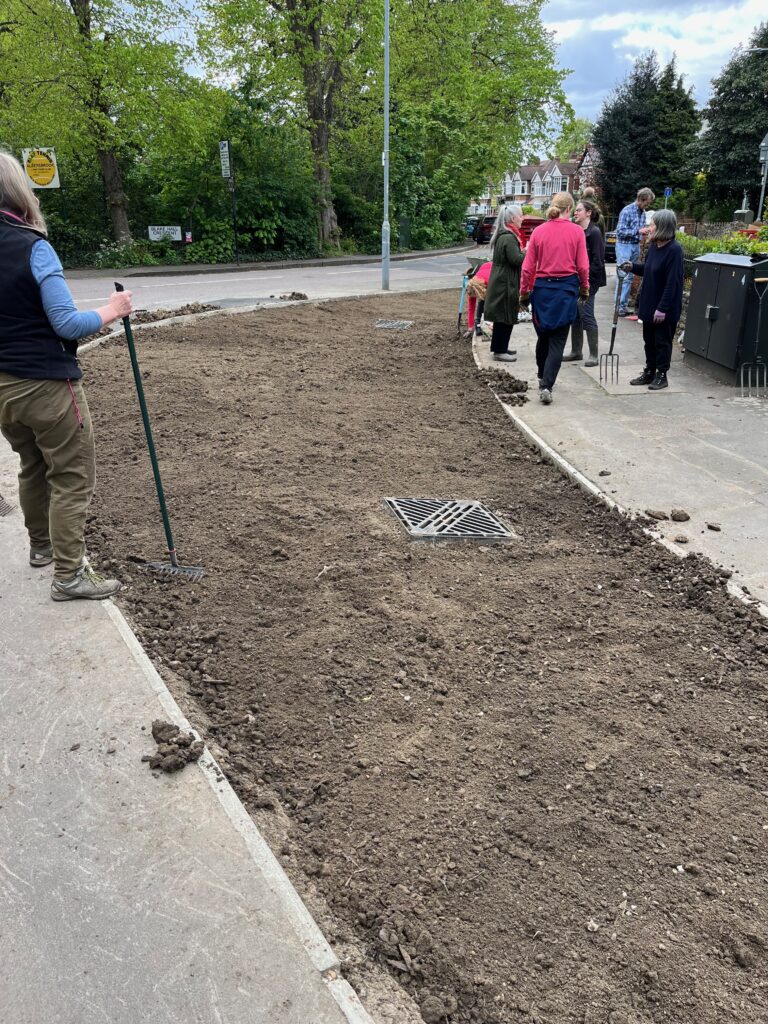
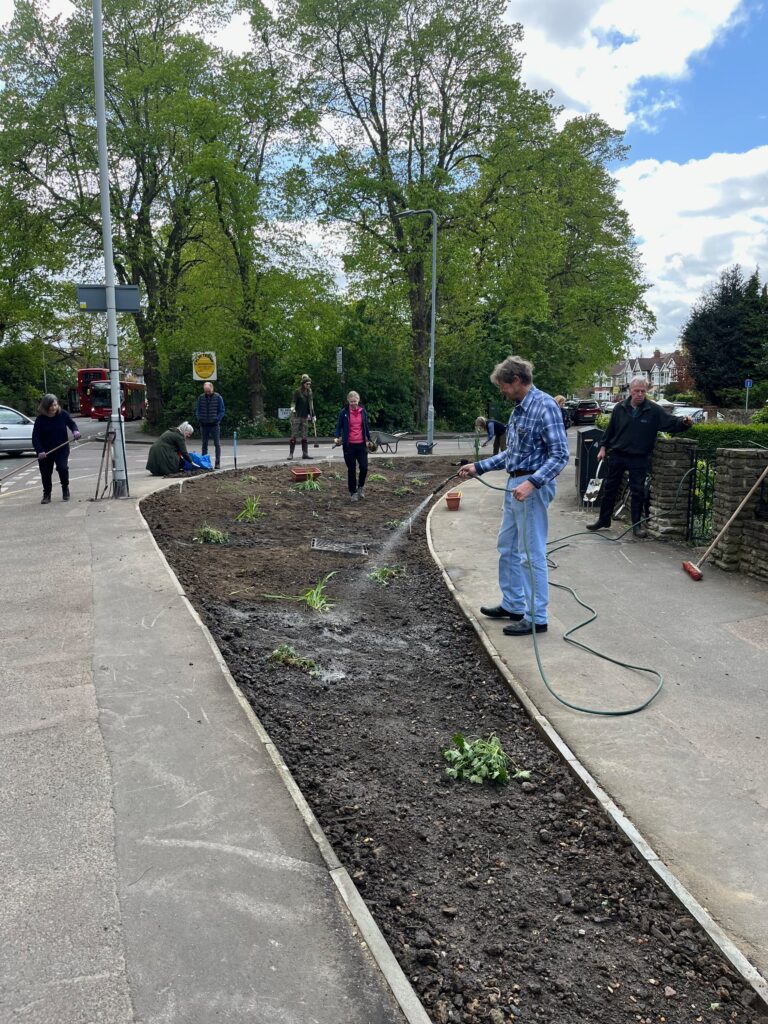
Many months ago, the AHS were approached by Councillor Blackman to garden at the junction of Blake Hall Road/ Blake Hall Crescent / Belgrave Road, on the Lakehouse Estate.

The area, adjacent to the bus stop was regularly being dug up by Thames Water to create a drainage system. The houses next to the site were constantly being flooded.

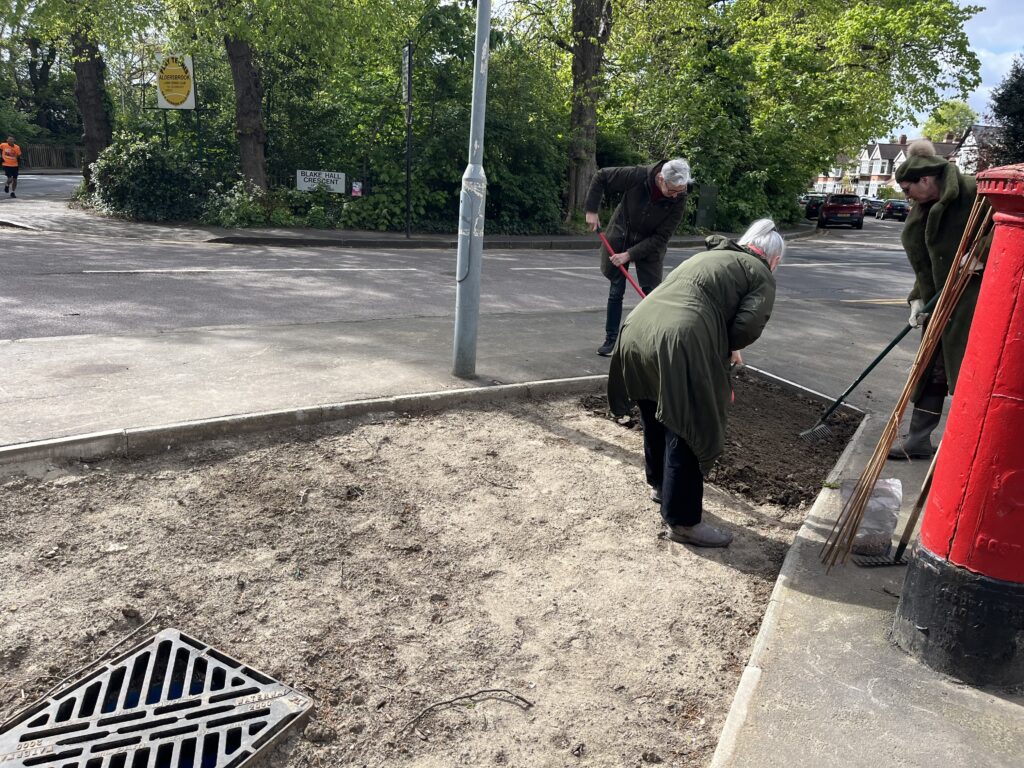
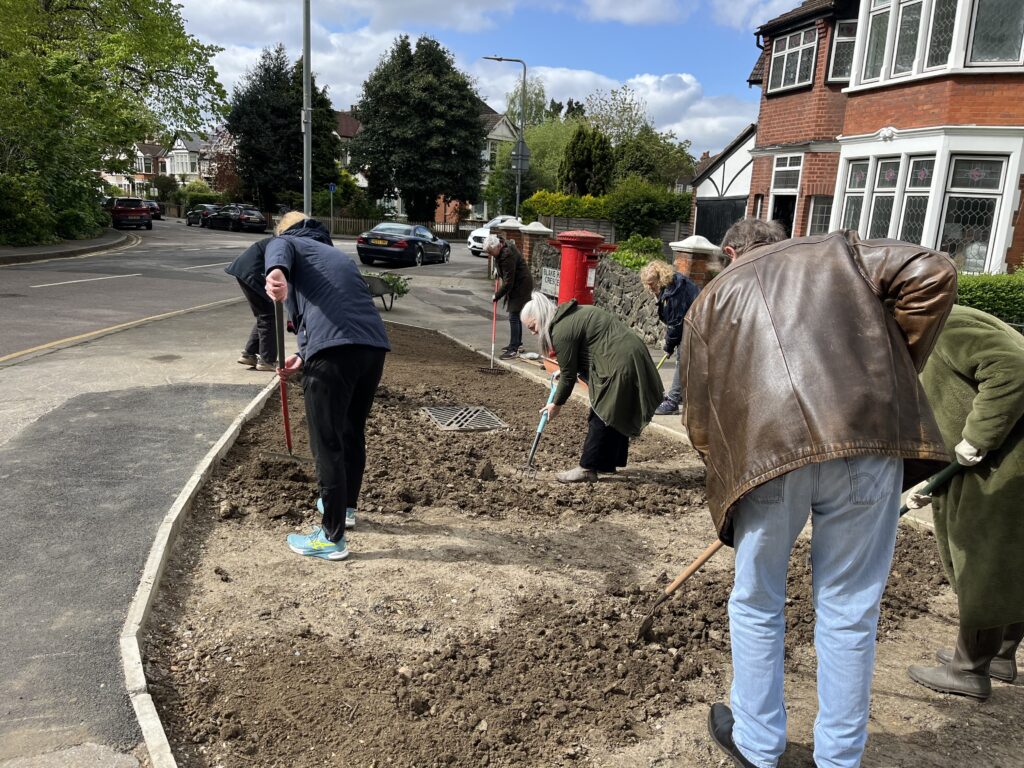
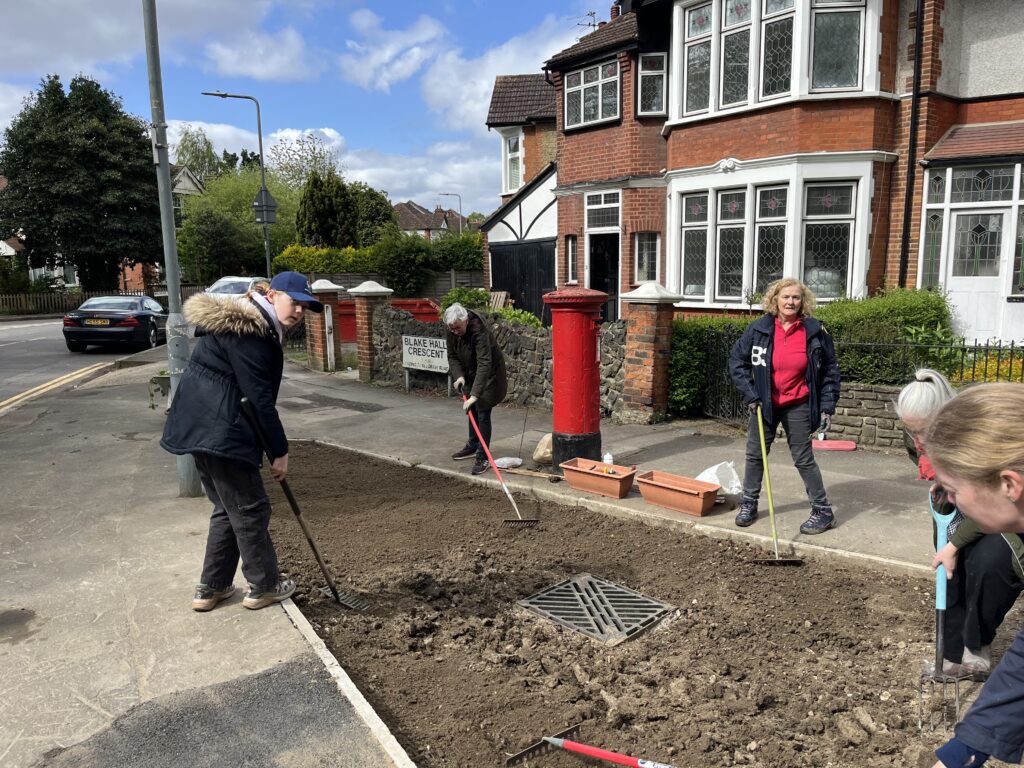
I went about rounding up a group of volunteers from the Lakehouse Estate to garden the plot. I received a response from 18 people who were interesting in helping.

After much negotiation and paperwork the plot was handed over to us by Simon Stodel, Neighbourhood Engagement and Education Officer of the London Borough of Redbridge.

On Saturday 20 April, thirteen volunteers met at the site. We prepared the plot, sowed the seeds, provided by the LBR and planted a variety of plants brought along by the volunteers.

All in all, a successful morning’s work.

Rosemarie Coffey, Lakehouse Estate and AHS Gardeners.

All you need to know about composting

Elaine Fieldhouse & Barry Reeves, both local gardeners, gave a fascinating talk at April’s AHS meeting about compost.  Elaine who has  a wonderful garden backing on to an allotment in Plaistow has 22 compost bins including 4 tumblers.  She explained  that the material in each compost takes about 6 to 8 months to break down.  Elaine creates wet compost with some plants – adding water to plants to make a slurry then she adds it to her compost bin.  She told us that rhubarb leaves break down quickly; that she packages kitchen waste adding water to make it more moist and she adds cardboard to wet compost .  Dry cardboard needs to be dampened. She doesn’t add any cooked food.  The advantage of home grown compost over bought compost is that its free and you know what goes into it.  Asked about adding weeds to compost bins she explained that weeds don’t come back if they are well rotted.  Elaine uses her home grown compost to mulch her garden and allotment carried out in October/November and then February.
Barry told us about using a Hot Compost bin.  The advantage of a Hot Bin is that it will fit into a small garden.  He told us to stick to the instructions provided with the bin – a starter bottle of liquid is provided at the beginning as well as wood chips it is important to add wood chips and shredded paper and cardboard to keep the contents of the bin aerated. The bin is provided with a kind of stirrer with which one can stir the contents. The contents of the bin get very hot as the bin is covered with a sort of polystyrene to heat the contents – the temperature gauge on the lid shows the temperature of the contents. When you open the hot bin you can see the steam coming from it. You can add cooked food to a Hot Bin as well as green garden waste but better to chop it up so that it breaks down quicker.  The contents of the bin should never be solid and the heat is enough to kill weeds.  At the bottom of the bin there is a blue tap from which you can drain liquid plant food.  Barry told us that he gets about 5 buckets of compost after 2 months – the compost is of great quality and doesn’t smell.